


NovaStar TU4K Pro LED processor is your all-in-one control hub for professional LED displays—combining 4K processing, built-in Android, wireless screen mirroring, and intuitive operation in a single box.
You might be setting it up for the first time or fine-tuning display settings for a presentation—either way, this guide walks you through every essential step: connecting sources, configuring outputs, controlling playback, and getting the best image quality. Get started fast and make the most of your TU4K Pro.
catalogue
1.What is the NovastarTU4K Pro LED Playback Control Processor?
If you manage an LED display for presentations, events, or digital signage, you’ve likely dealt with a complex setup: a media player for content, a separate sending card to drive the screen, extra cables, and often a dedicated computer. The Novastar TU4K Pro is designed to consolidate all of that into a single, powerful device.
Novastar processorTU4K Pro Front Panel

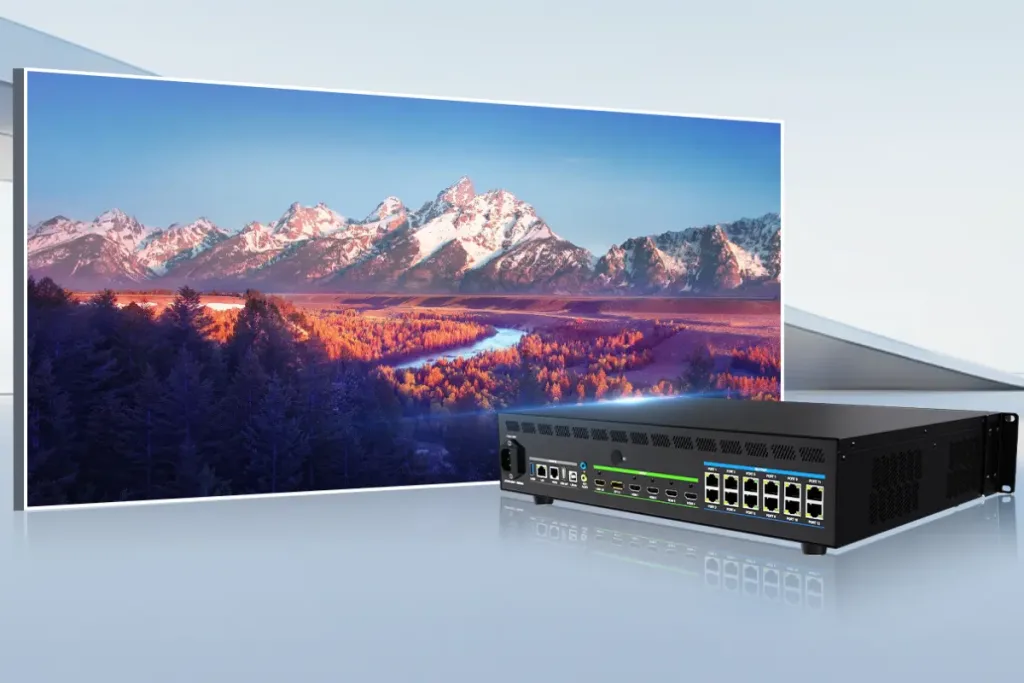
Novastar processorTU4K Pro Rear Panel

At its core, NovastarTU4K Pro LED processor is an all-in-one control unit that combines three critical functions:
- A Media Player: It runs on Android 13, allowing you to install apps, browse the web, and play content directly.
- A Video Processor: It handles multiple high-resolution inputs (like HDMI from your laptop), scales and optimizes the image, and manages complex screen layouts.
- An LED Sending Card: It directly outputs the signal to your LED display modules via its 20 Gigabit Ethernet ports, eliminating the need for a separate sending card.
In simple terms, the Novastar processor TU4K Pro is the brain and the nerve center for your LED screen. It takes content from various sources, processes it, and ensures it displays perfectly across your entire display wall. This integration makes it an ideal solution for users who want professional-grade performance without the complexity of managing multiple devices—perfect for corporate boardrooms, university lecture halls, retail showrooms, and event venues.
2.Key Features and Specification of the NovastarTU4K Pro
Key Features of NovastarTU4K Pro
Triple Video Input + Built-in Android
Connect up to three external sources (1× HDMI 1.3 + 2× HDMI 2.0) and use the internal Android 9.0 system as a fourth source—ideal for switching between a laptop, media player, and local apps without extra hardware.
True 4K Output via Dual-Link DVI
Drive high-resolution LED walls up to 3840×2160@60Hz with support for up to 4 million pixels per link, ensuring sharp, seamless visuals even on large displays.
Universal Wireless Screen Mirroring
Mirror content wirelessly from Windows, macOS, iOS, and Android devices directly to the screen—no dongle required (though USB wireless adapters are supported for extended compatibility).
AI-Powered Image Optimization
Automatically enhance picture quality using AI Image Enhancement, which reduces noise and sharpens edges. Choose from four preset modes—Standard, Meeting, Vivid, and Skin—to match your environment or content type.
Flexible Control from Anywhere
Operate the TU4K Pro via the front-panel LCD, included infrared remote, or mobile apps (ViPlex Handy and VNNOX Care) over Wi-Fi or Ethernet. RS232 support also enables integration with third-party control systems.
On-the-Fly Scaling & Layout Adjustment
Easily adjust output scaling, aspect ratio, and positioning through intuitive menus to perfectly fit your LED screen.

Specification of TU4K Pro
| Parameter | Value |
|---|---|
| Max Output Resolution | 3840 × 2160 @ 60Hz (dual-link DVI) |
| Pixel Capacity | Up to 4 million pixels per link |
| HDMI Inputs | 1× HDMI 1.3 (1920×1200@60Hz), 2× HDMI 2.0 (3840×2160@60Hz) |
| Wireless | Wi-Fi 5 (802.11ac, dual-band 2.4/5GHz), Bluetooth 4.0 |
| Network | Gigabit Ethernet (RJ45) |
| Control Interfaces | IR remote, front LCD, RS232, Ethernet, ViPlex Handy / VNNOX Care apps |
| Power Supply | 100–240 V AC, 50/60 Hz |
| Dimensions | 482 × 270 × 44 mm (1U rack-mountable) |
| Operating Temp. | 0°C to 45°C |
3.How to Connect LED Screens with TU4K Pro LED Processor
Connecting your LED display to the Novastar TU4K Pro is a straightforward process. This section provides a clear, step-by-step guide to establish a reliable physical link between the processor and your screen.
Step 1: Identify Your Output Ports
Locate the 20 numbered Gigabit Ethernet (RJ45) output ports on the rear panel of your TU4K Pro LED processor. These are your primary ports for sending data to the LED cabinets.
Step 2: Prepare Your Cables
Use standard CAT5e (or higher) Ethernet cables. For longer runs or to avoid electrical interference, you can utilize the two OPT fiber optic ports with compatible optical modules and fiber cables.
Step 3: Establish the Data Connection
Connect one end of an Ethernet cable to an output port (e.g., Port 1) on the Novastar processor. Connect the other end to the first receiving card in your LED cabinet array. Repeat this process, connecting Port 2 to the next cabinet in the chain, and so on.
The data flow typically starts from the cabinet connected to Port 1. Ensure your physical cabinet layout matches the intended configuration in the processor’s software for a correct image.
Step 4: Connect the Power and Input Sources
Plug the TU4K Pro into a power outlet using the provided cable. Connect your content sources (e.g., a laptop via HDMI, a USB drive) to the corresponding input ports on the rear panel.
4.Configuring Screen Layouts, Output Areas, and Scaling
Once your Novastar TU4K Pro is connected and powered on, the next critical step is to tell the processor exactly how your LED cabinets are arranged. This process, known as screen configuration or mapping, ensures the input image is correctly spread across your entire display.
Enabling Cabinet Mapping (Visual Diagnostics)
Before you start, enable a helpful visual aid:
- Navigate to LCD Menu > Screen Configuration > Mapping and turn it On.
- This function makes each cabinet temporarily display its Ethernet Port number and Receiving Card ID.

Using Quick Configuration (For Standard Layouts)
For a grid of identical cabinets connected in order, the Quick Configuration tool automates the setup.
- Go to LCD Menu > Screen Configuration > Quick Configuration.
- Enter the basic parameters of your screen:
Cabinet Row Qty / Column Qty: The grid size (e.g., 2 rows by 3 columns).
Port 1 Cabinet Qty: How many cabinets are connected to the first Ethernet port.
Data Flow: Select the direction the signal travels across the cabinets (e.g., from left to right, top to bottom).
- The Novastar processor will then calculate and apply the configuration. Your full screen should now display a single, unified image.

Saving Your Configuration to Hardware
This is a crucial step to ensure persistence.
- After configuring the layout and scaling, go to Screen Configuration > Save to Hardware.
- Confirm the action. This permanently saves the settings to the TU4K Pro’s internal memory.
- Benefit: Your screen will now boot up correctly every time, even after a power cycle, without needing reconfiguration.

Practical Scenario: Conference Room Setup
Imagine a 3×3 video wall in a boardroom. You would:
- Use Mapping to confirm all 9 cabinets are detected and in the right order.
- Use Quick Configuration to set Rows=3, Columns=3, and define the data flow.
- Use Scaling to ensure a guest’s laptop presentation fills the entire video wall seamlessly.
- Save to Hardware so the layout is ready before every meeting.
Successfully configuring the screen layout unlocks the full potential of your Novastar Processor. With the display correctly mapped, you can now focus on fine-tuning the image quality, which we will cover in the next section on adjusting brightness, color, and display modes.
5.Adjusting Brightness, Color, and Display Modes for TU4K Pro LED Processor
After configuring your screen layout, the next step is to fine-tune the image to achieve the perfect visual output for any type of content. The Novastar TU4K Pro provides intuitive, multi-layered controls for adjusting brightness, color, and display modes, making it easy to optimize the picture for a boardroom presentation, a vibrant video, or a video conference.

Basic On-the-Fly Adjustments (Via LCD Menu)
For quick, essential adjustments without entering the full system, use the front-panel LCD menu. Press the knob on the TU4K Pro LED processor to enter the Main Menu:
- Adjusting Brightness: Navigate to Screen Brightness (%). Rotate the knob to increase or decrease the overall brightness and press to confirm. This is crucial for matching the screen brightness to ambient room lighting.
- Adjusting Volume: Select Volume and rotate the knob to control the system’s audio output level.
Selecting the Right Display Mode (Scene Optimization)
The Novastar processor includes several preset display modes designed for specific content types. Access these via LCD Menu > Effects > Mode or in the Settings app.
- Standard Mode: The balanced default setting, suitable for general use and mixed content.
- Meeting Mode: Optimized for clarity and reduced eye strain. It enhances text and graphic sharpness, making it ideal for PowerPoint presentations, spreadsheets, and documents.
- Vivid Mode: Boosts color saturation and contrast, delivering a more dynamic and engaging picture perfect for video playback, advertisements, and promotional content.
- Skin Tone Mode: Calibrated to render human skin tones naturally and accurately, ensuring participants look their best during video conferences or live broadcasts.
- Eye Comfort: An option within the mode menu that adds a warmer, yellowish tint to the display to reduce blue light exposure during prolonged viewing sessions.
Advanced Fine-Tuning and Intelligent Features
For further customization, delve into the Advanced settings under Effects or the Display and Effects system menu.
- Manual Color Controls: Adjust parameters like Contrast, Saturation, Color Temperature (warm/cool balance), and Hue to match your precise preferences or brand colors.
- AI Image Enhancement: Enable this intelligent feature (Effects > Advanced) to allow the TU4K Pro LED Playback Control Processor to analyze each frame in real-time. It automatically enhances sharpness, optimizes colors, and applies dynamic motion compensation for a consistently superior picture.
- HDR (High Dynamic Range): For compatible HDR10 content from HDMI sources or the Android system, enabling HDR (Video Source Settings > HDR) unlocks greater contrast between the brightest whites and darkest blacks, revealing more detail in shadows and highlights.

Quick-Start Guide for Common Scenarios
- Starting a Business Presentation: Switch to Meeting Mode and slightly increase brightness if the room is well-lit.
- Playing a Promotional Video: Select Vivid Mode and ensure AI Image Enhancement is turned on for maximum impact.
- Hosting a Video Call: Activate Skin Tone Mode to ensure natural-looking participants.
6.Using Wireless Control, Screen Mirroring, and Remote Operation
Novastar TU4K Pro is designed to free you from being tethered to the equipment rack. Its suite of wireless and remote control features empowers you to manage your display and present content from anywhere in the room with ease. This section covers the core methods of interaction: the physical remote, wireless screen mirroring, and mobile app control.
Mastering the Bluetooth Voice Remote
The included remote is your primary daily controller. Here’s how to use its key functions:
- Navigation & Selection: Use the directional pad and the central OK/Confirm button to navigate menus.
- Quick Access Buttons:
Home (◉): Short press to return to the Android home screen. Long press to switch between open apps.
Menu (≡): Opens the shortcut menu or system settings.
Back (←): Returns to the previous screen.
- Voice Control (Microphone Button): Long press to activate voice commands for opening apps, searching, or controlling playback.
- Volume & Cursor Control: Dedicated volume buttons and a motion-activated cursor mode (activated by a dedicated button) for point-and-click navigation.

Wireless Screen Mirroring from Any Device
This is a standout capability of the TU4K Pro LED Processor, allowing you to share content directly from your personal device to the big screen.
From a Smartphone or Tablet (iOS/Android):
- Ensure your mobile device is connected to the TU4K Pro’s Wi-Fi hotspot or to the same local network as the processor.
- For iOS: Open Control Center, tap Screen Mirroring, and select your Novastar processor from the list.
- For Android: Open the ViPlex Handy app, connect to your device, and tap the Screen Mirroring function. You can also mirror documents, images, and videos directly from within the app.
From a Windows PC or macOS Computer:
- Windows: Download the “LinkED” client from the provided website, connect your PC to the TU4K Pro’s network, and the app will detect the processor for you to start projection.
- macOS: Use the built-in AirPlay function. Click the AirPlay icon in the menu bar and select your Novastar TU4K Pro to begin mirroring.
Advanced Control with the ViPlex Handy Mobile App
The ViPlex Handy app transforms your smartphone into a powerful wireless control center and content manager for the Novastar Processor.
- Remote Control Interface: Provides a full touchpad, keyboard, and dedicated buttons (Home, Back, Volume) to control the Android system remotely.
- Content Management & Publishing: Directly upload media files (videos, images) from your phone to the processor’s library and create or publish playback programs.
- Interactive Whiteboard & Annotation: When enabled, use your phone to draw or annotate directly over the displayed content—perfect for presentations and collaborative sessions.

7.Managing Playback Content and Schedules on Novastar TU4K Pro
Novastar TU4K Pro functions as a capable media center for scheduled playback. Here’s how to manage content and automation.
Import and Organize Media
- Use the built-in Media Player app.
- Insert a USB drive, go to Library > Import to add videos (MP4, MKV) and images (JPG, PNG).
- Files are automatically sorted into Videos and Images categories.
Create Playback Programs (Playlists)
- In the Program tab, select Create to make a new playlist from your library files.
- Set Play Order: Choose Repeat List (loops), Play Once, or Repeat One (single item loop).
- Select Publish to send the program to the screen for playback, controllable via the remote.
Automate Playback with Schedules
- Basic Auto-Start: Enable Settings > General > Play Program at Startup. Choose to resume the last played program or always start a specific one.
- Advanced Scheduling: Use the ViPlex Handy mobile app to create detailed daily or weekly timetables, dragging programs into time slots for fully unattended operation.
8.FAQs
9.Conclusion
Your Novastar TU4K Pro LED Processor is now fully set up and ready to power your display. For optimal performance in daily use, remember to verify your active input source and wireless connections before each session. Should you require further assistance or system updates, NovaStar’s official support resources remain available for guidance.
 Complete Guide To Colorlight X8m And X12m LED Video Processors
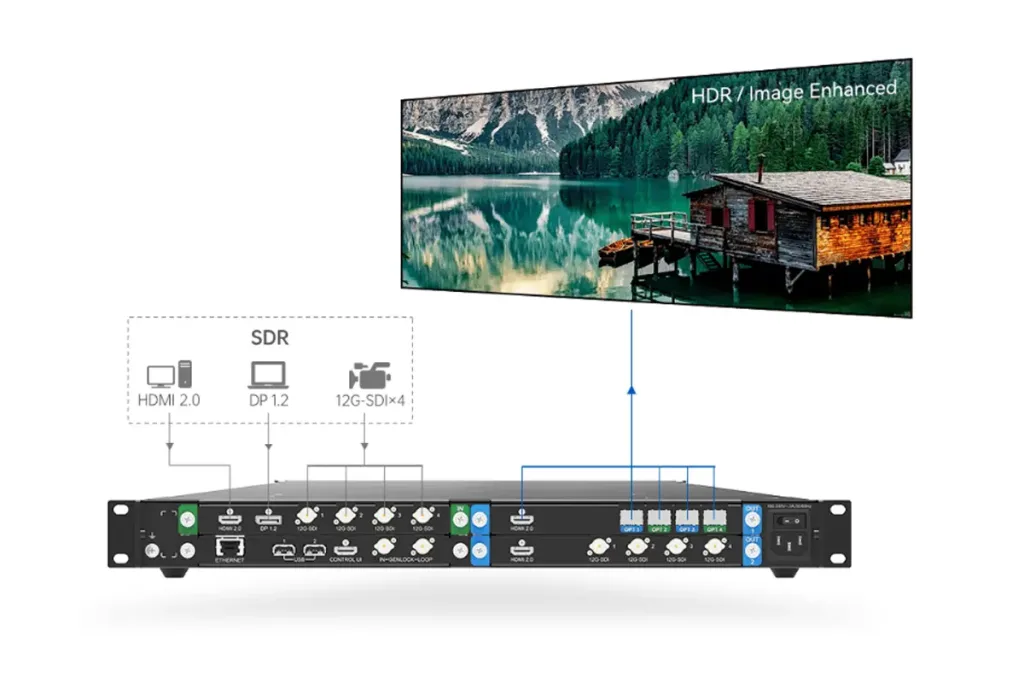 A Deep Dive Into The Novastar HDR Master 4K Video Processor


