
A LED display board for advertising only earns its keep when the pixel plan behind it is right. Pixel planning is the step that turns a commercial requirement — a headline a driver finishes before the lights change, a logo a pedestrian recognises from across the street — into a pixel matrix, a pixel pitch, a canvas size and a file specification. Get it right and the board looks sharp on day one. Get it wrong and no amount of brightness or colour tuning will rescue a blurred logo or a headline that nobody can read in time.
Quick answer: start from the viewing distance, not from the pixel pitch. Decide who has to read the board and from how far, convert that into a required pitch, and then work back to resolution, cabinet layout and aspect ratio. The centre-to-centre distance between pixels, the number of pixels on the face and the canvas your designer delivers should all be derived from that single number.
This guide is written for advertisers, media owners, integrators and municipal buyers who have to sign off a specification and live with the result. It covers the pixel matrix, aspect ratio, pixel pitch, the viewing-distance and font-size formulas, a worked example, a planning table and the checks that keep a project inside its budget. EagerLED project and product data are used as worked examples throughout.
1. What Pixel Planning Means for an LED Display Board for Advertising
Pixel planning for an LED display board for advertising is the discipline of defining the image before the hardware. It answers four questions, in order: how far away is the viewer, how large is the visible area, how many pixels can that area physically carry, and what content will actually run on it. Everything else — cabinets, power, controllers, processing and structure — is a consequence of those four answers.
Most disappointing advertising boards are not badly built. They are badly planned. A fine-pitch board on a gantry where nobody stands closer than 20 metres pays for detail the audience cannot resolve. A coarse-pitch board above a shop window that pedestrians pass at two metres looks visibly blocky. Both screens can be perfectly manufactured and still fail the commercial job they were bought for.
1.1. The Four Numbers That Have to Agree Before You Order
- Viewing distance. The nearest realistic viewer and the typical viewer decide how fine the pixels must be. This comes first because it is set by the site, not by the factory.
- Physical canvas. The width and height of the visible image area in metres, after cabinet borders and any mounting frame or cladding are accounted for.
- Pixel matrix. The number of pixel columns and rows the canvas will carry — the canvas size divided by the pixel pitch.
- Content canvas. The design resolution your creative team will deliver to the screen, ideally the native pixel matrix or a clean multiple of it.
1.2. Why It Is a Commercial Decision, Not Only a Technical One
Pixel pitch is the largest single cost driver in an advertising LED board, so the planning conversation is really a budget conversation. Buying a pitch finer than the viewing distance requires pays for pixels the audience cannot see, and that money is usually better spent on brightness headroom, weather protection, a better control system or a longer warranty.
The opposite mistake costs more. A board that is unreadable at the distance where the advertising actually happens fails to deliver the impressions it was sold on, and re-cladding or replacing it later costs far more than the difference in pitch price at the start.
2. Start with the Pixel Matrix: Resolution, Canvas and Aspect Ratio
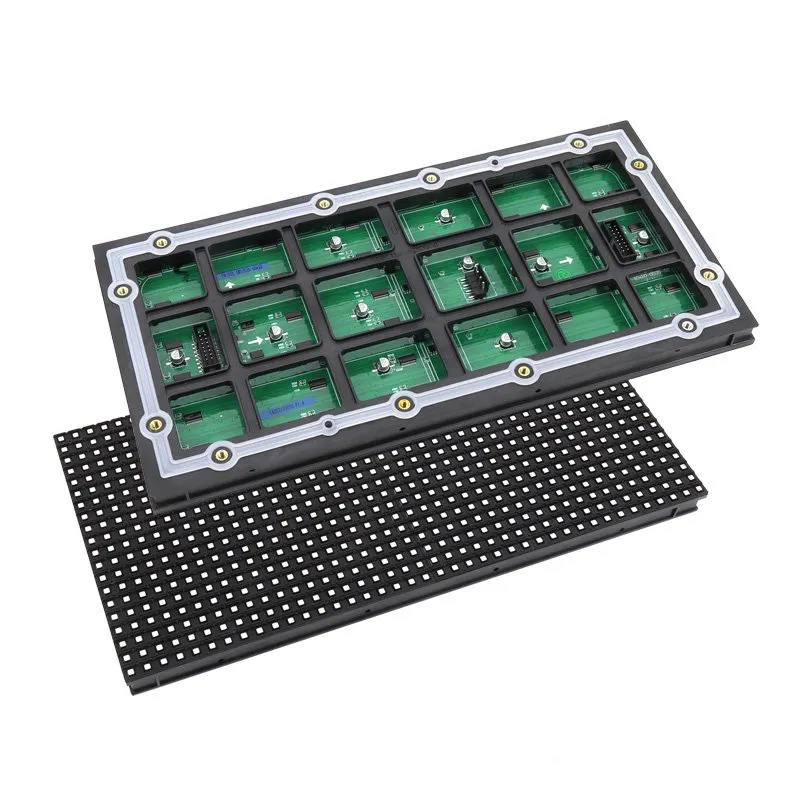
The pixel matrix is the grid of individually controlled light sources on the face of the board. Each pixel is normally one red, one green and one blue LED packaged together, which is what lets the screen reproduce full colour. Understanding that grid is what makes the rest of the arithmetic simple, and it is the foundation of every LED screen resolution decision you will make afterwards.
2.1. How the Pixel Matrix Is Built from Modules and Cabinets
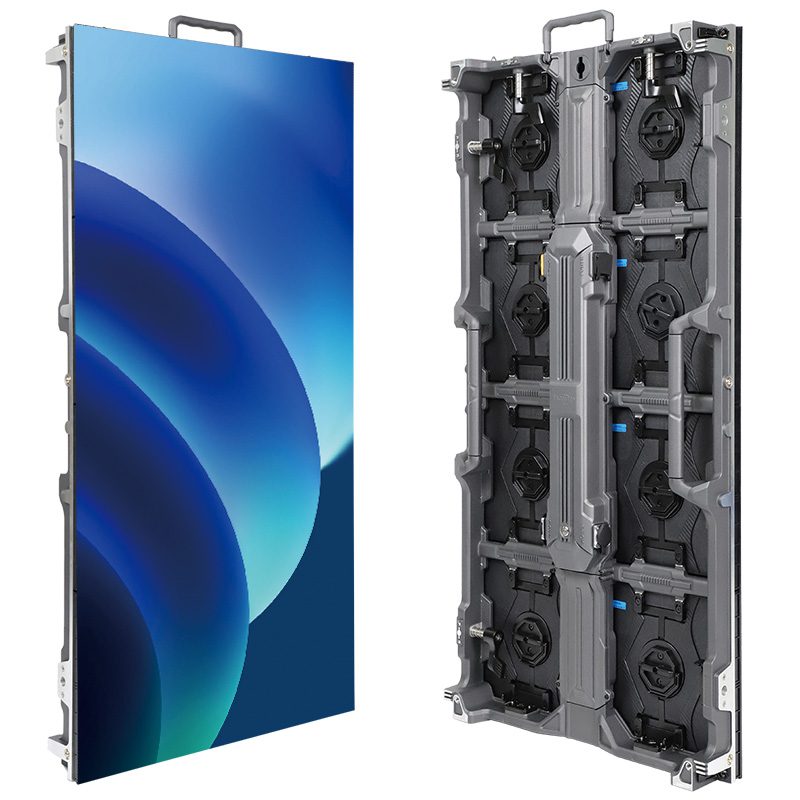
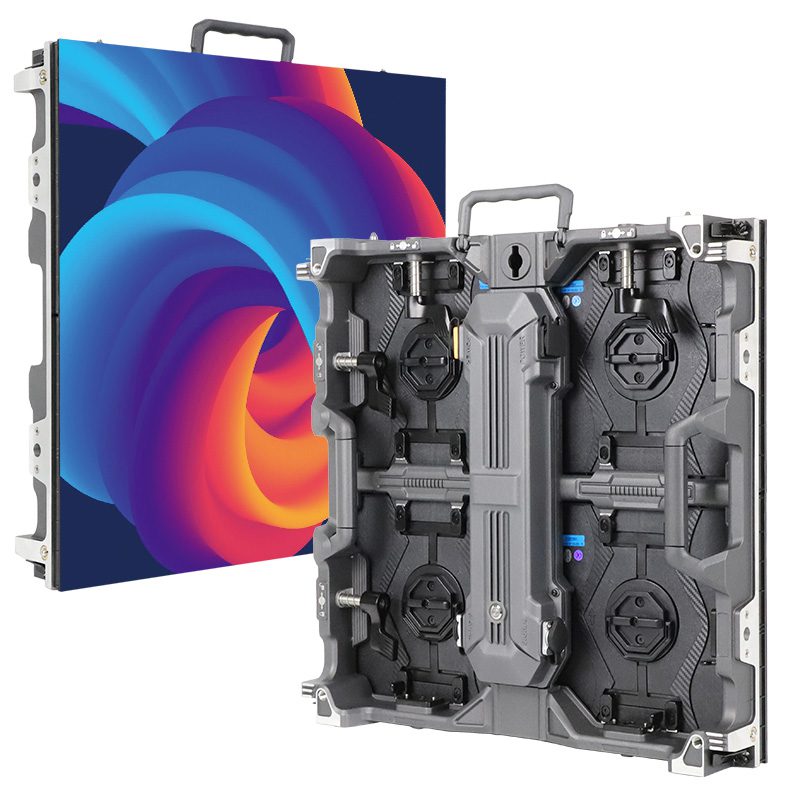
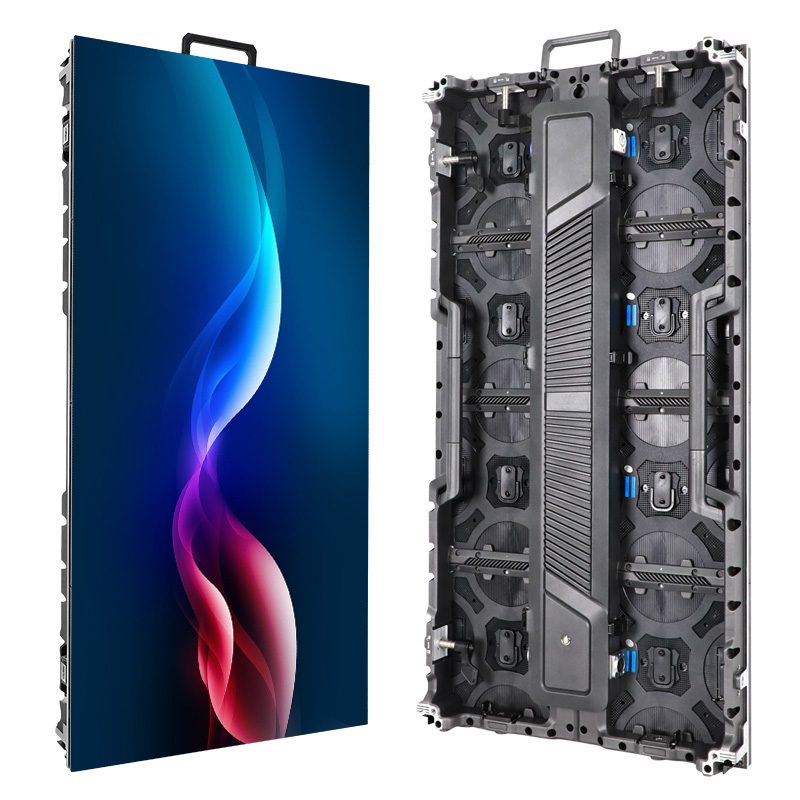
A large advertising board is not one panel. It is an array of modules, grouped into cabinets, tiled into a canvas. The native resolution of the finished board is therefore the sum of the module grids: if one cabinet carries 256 × 128 pixels and the canvas is five cabinets wide and three cabinets high, the native pixel matrix is 1,280 × 384.
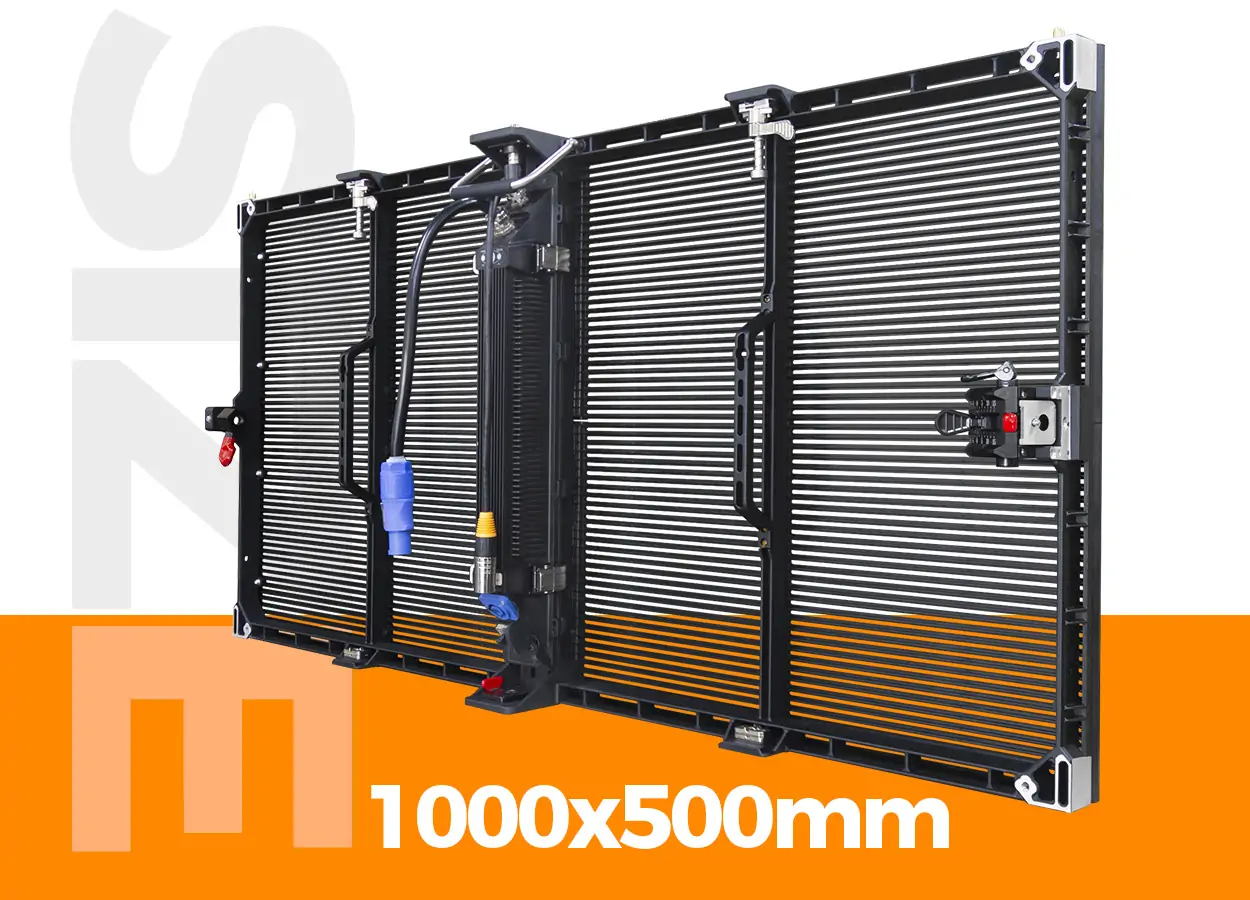
That arithmetic is why cabinet dimensions matter as much as pitch. Cabinets are modular multiples of the module size, so achievable canvas sizes come in steps. Ask for the full cabinet dimension list early, because a board that has to fit a 6.2 m opening may need a different cabinet format than one that can be built to any size at all.
If you are still deciding how large the finished display should be, the same logic applies from the other direction: fix the wall, then find the cabinet combination that fills it — the approach set out in this guide to the right LED display size.
2.2. Aspect Ratio: Match the Canvas to the Content You Will Run
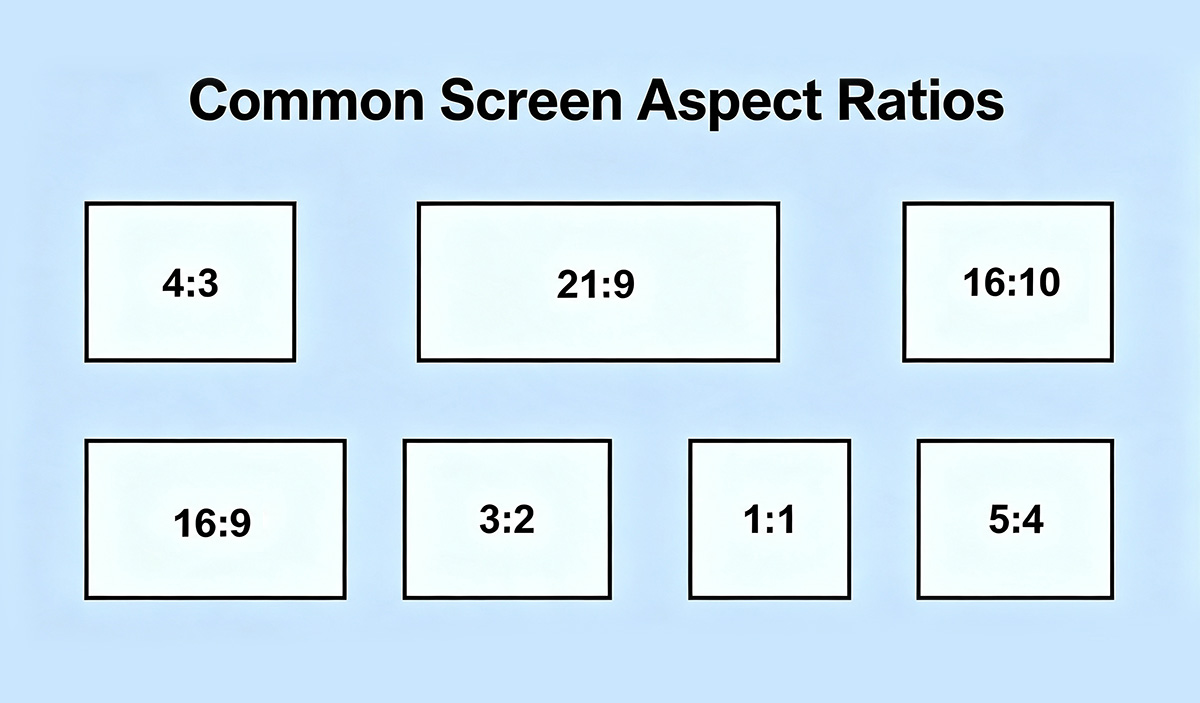
Aspect ratio is the relationship between the width and the height of the image area. For an advertising board it is a content decision as much as a technical one, because almost all creative arrives in standard formats. The ITU-R BT.709 recommendation is the reference behind the 16:9 shape that video production still uses worldwide.
- 16:9 is the default for video, broadcast and most agency footage. If the advertising plan depends on video, design the board around 16:9 unless the building forbids it.
- 4:3 survives in legacy content libraries and in some indoor signage networks.
- Custom ratios — ultra-wide banners, portrait pillars, corner cubes — are common outdoors, because the board has to fit a structure rather than a television. Custom is fine, but the creative then has to be re-cut for it, every time.
The practical rule is to fix the aspect ratio before the structural drawings and to confirm that your creative team can supply that canvas for the whole contract term. A 16:9 board that receives 4:3 files every month will either letterbox or crop the advertiser logo, and neither looks good on a street. The trade-offs are compared in more detail in this guide to 16:9 LED display design.
2.3. Worked Example: Sizing a 6 m × 3 m Advertising Board
Take a roadside board with a visible image area of 6 m wide by 3 m high — a 2:1 shape that suits banner-style advertising.
- Choose the pitch. The nearest realistic viewer is a car stopped at the junction about 8 m away, so a P8 board is the starting point. The pitch calculation is worked through in section 3.
- Convert metres to pixels. 6,000 mm ÷ 8 mm = 750 pixels wide. 3,000 mm ÷ 8 mm = 375 pixels high.
- Check against the cabinet grid. A 500 × 500 mm P8 cabinet carries 62 × 62 pixels, so twelve cabinets across gives 744 pixels and six cabinets down gives 372 pixels. The practical canvas is therefore 744 × 372, not the round number.
- Set the content canvas. Design at 744 × 372, or at a clean multiple such as 1,488 × 744, and let the controller scale down to the native matrix.
Notice what the example shows. The physical size and the pixel count are linked by the pitch, and the cabinet grid then takes the last few percent. Plan all three together, or you will discover the discrepancy during commissioning, when the cladding is already on the building.
3. Pixel Pitch: The Decision That Sets Quality and Price
Pixel pitch is the number most buyers fix on first, and the one most likely to be chosen for the wrong reason. It sets how much detail the board can show, how close people can stand before the image breaks into dots, and a large part of the purchase price. Choosing it from the site rather than from a specification sheet is the single highest-value decision in the whole plan.
3.1. What Pixel Pitch Actually Measures
Pixel pitch is the centre-to-centre distance between two adjacent pixels, measured in millimetres. A P4 board has pixels 4 mm apart; a P10 board has them 10 mm apart. A smaller number means more pixels per square metre, which means finer detail, a closer usable viewing distance and a higher price.
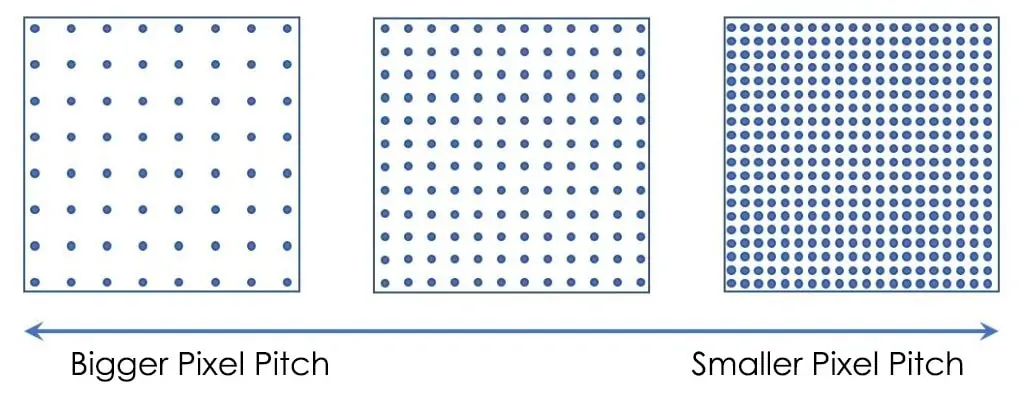
Two boards can be the same size, the same brightness and the same warranty and still carry very different pixel counts. For advertising, pixels per square metre is a more useful comparison figure than the diagonal measurement, because it decides how much text and product detail the board can carry before it starts to look coarse.
3.2. The Viewing-Distance Formula and the Rule of Thumb
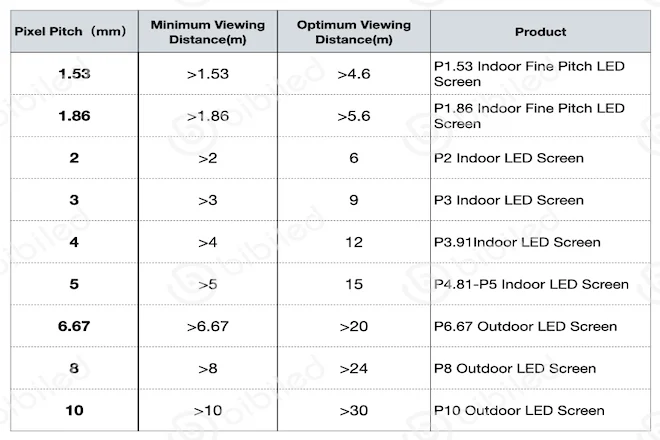
The planning rule used across the LED industry is that the minimum comfortable viewing distance in metres is roughly the pixel pitch in millimetres multiplied by one, and the optimum viewing distance is roughly the pitch multiplied by three. The same arithmetic runs in both directions: given a distance, you can read off the pitch you need.
Pixel planning formulas
Minimum viewing distance (m) ≈ pixel pitch (mm) × 1
Optimum viewing distance (m) ≈ pixel pitch (mm) × 3
Pixel matrix (px) = canvas size (mm) ÷ pixel pitch (mm)
Pitch is a physical property of the module and cannot be changed after delivery, so this is the number to get right before the order.
Worked example. A shopfront board that pedestrians pass at 4 m needs a pitch of about P4 or finer. A motorway gantry first read at 60 m is comfortably served by P20, because 60 ÷ 3 = 20. Specifying P10 on that gantry would add cost without adding a single readable letter, unless the same board also faces slow traffic much closer to the structure.
3.3. Choose Pitch by Advertising Use Case
The table below converts typical advertising situations into a starting pitch. Treat it as a shortlist, then confirm with the actual sightlines on site — the nearest viewer is the one who decides.
| Advertising situation | Nearest realistic viewer | Starting pitch | Why |
|---|---|---|---|
| Motorway or trunk-road gantry | Passing traffic, first readable at 50-80 m | P10 to P20 | Distance removes the need for fine detail; brightness and structure matter more |
| City roadside board at a junction | Stopped traffic, 8-15 m | P6 to P10 | A stopped driver can read more, but a coarse image still looks soft |
| Building facade above a retail street | Pedestrians and slow traffic, 6-12 m | P4 to P8 | Mixed audience; a mid-range pitch balances detail and cost |
| Shopfront window board | Pedestrians at 2-5 m | P2.5 to P4 | Close viewing makes coarse pitch obvious |
| Street pillar or kiosk under 2 sq m | Pedestrians at 1-3 m | P1.5 to P2.5 | Small canvas needs high pixel density to carry legible text |
| Stadium perimeter or concourse | Spectators at 5-30 m | P6 to P10 | Wide distance range; cameras also capture the board |
| Transport hub wayfinding and advertising | Commuters at 3-8 m | P3 to P5 | Reading time is short and content is text-heavy |
3.4. Where Pitch Drives Cost — and Where It Does Not
Halving the pixel pitch roughly quadruples the number of LEDs and driver channels per square metre. That is why pitch dominates the bill of materials: more LEDs, more driver ICs, finer printed-circuit work, tighter colour binning and a longer calibration. The parts that do not scale with pitch are the ones worth remembering in a budget meeting — cabinet, steel structure, power infrastructure, controller, installation and access equipment are largely the same whether the board is P4 or P8.
That is the argument for spending the pitch budget where the audience actually stands. A city-centre board on a pedestrian route should have a fine pitch. A motorway gantry should have a coarse one, with the saving moved into brightness headroom, ingress protection and service access. If the pitch has to be balanced against cost, the comparison is explored alongside how to choose the best pixel pitch for a specific site.
4. Plan for Daylight: Brightness, Colour and Bit Depth
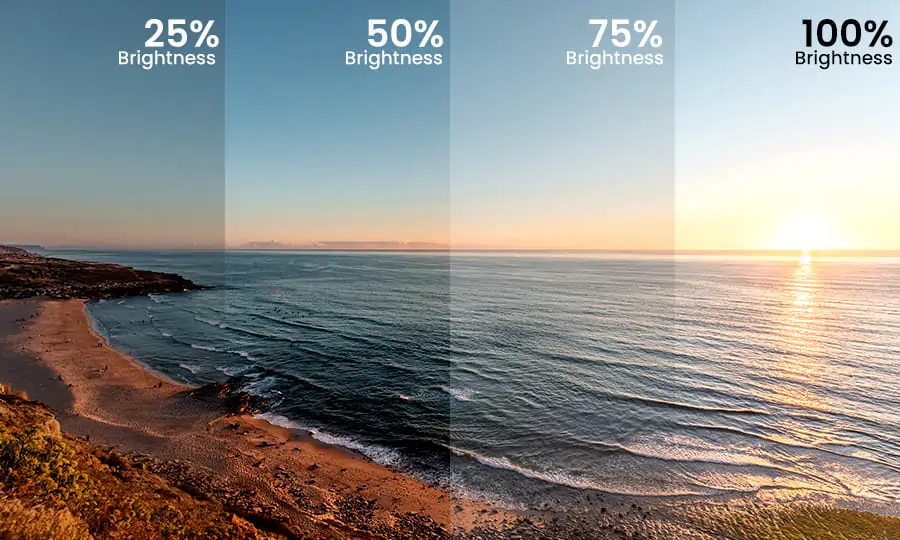
An advertising board is judged in the worst conditions it will ever meet: low sun directly on the screen, a bright overcast lunchtime, or a broadcast camera pointed at it during a live event. Brightness, contrast, bit depth and refresh rate are specified together for exactly that reason, and they should be planned as a set rather than as three separate line items.
4.1. Brightness in Nits, by Orientation and Ambient Light
Brightness is measured in candelas per square metre, normally written as nits. Outdoor advertising boards commonly start around 5,000 nits and reach 8,000 to 10,000 nits for surfaces that face the sun. The figure that matters is not the peak number on a datasheet but the sustained brightness after calibration, with the power and thermal design able to hold it at midday.
- Shaded or north-facing boards can be specified lower, which saves power, heat and long-term LED stress.
- Sun-facing boards need headroom plus automatic brightness control that follows ambient light rather than a fixed daily schedule.
- Night operation has to dim well below peak. A board that cannot dim smoothly will either glare into nearby windows or look washed out at dusk, and it will attract complaints either way.
The wider selection logic, including contrast and viewing conditions, is covered in this guide to LED display brightness and to screen contrast ratio.
4.2. Grayscale, Refresh Rate and Camera-Friendly Playback
Grayscale, or bit depth, describes how many brightness levels each colour channel can produce. Shallow bit depth shows up as banding in gradients and as stepped, blocky fades — very visible on a large advertising board at night, where a smooth fade to black is the hardest thing the screen has to do.
Refresh rate is the second half of the same problem. A high refresh rate keeps the image free of scan lines and flicker when a phone or a broadcast camera films the screen, which matters for any board near an event venue, a stadium, a tourist route or a live television position.
4.3. What to Lock Down in the Specification
- Brightness in nits, measured after calibration, together with the measurement method and the area measured.
- Refresh rate in hertz at the driving mode you will actually run, not the best case in a laboratory.
- Grayscale in bits per colour channel, and confirmation that it is maintained at low brightness, not only at full output.
- A white-point and colour-temperature target, so that two boards in the same network match each other on screen.
- The dimming curve and the ambient sensor, including the minimum night-time level.
- Colour performance referenced to a published standard rather than to a marketing description; the International Commission on Illumination publishes the colorimetry that measurement should follow.
5. Plan the Content Before the Hardware
Content is where a good pixel plan is either confirmed or quietly abandoned. A board with a well-chosen pitch still disappoints if the creative arrives at the wrong canvas, if the headline is set too small for the viewing distance, or if the file is too heavy for the media player to switch cleanly. Planning the content alongside the hardware removes almost all of that risk.
5.1. The Font Size Formula for a Readable Advertising Board
Signage practice treats legibility as a function of letter height and viewing distance, and the same logic applies to a pixel-based board. The classic rule of thumb is one inch of capital-letter height for every ten feet of viewing distance; converted to metric, that is roughly 8 mm of letter height per metre for the distance at which a sign is still legible, and around 25 mm per metre for comfortable reading. Published sign standards such as the Manual on Uniform Traffic Control Devices formalise the same idea by setting letter heights for different road speeds.
Font and text formulas
Minimum letter height (mm) ≈ viewing distance (m) × 8
Comfortable letter height (mm) ≈ viewing distance (m) × 25
Letter height (px) = letter height (mm) ÷ pixel pitch (mm)
A letter needs roughly 14 pixels of height or more to stay recognisable, which links the font size directly back to the pitch decision.
Worked example. A board whose nearest reader is 20 m away needs a headline about 20 × 25 = 500 mm tall for comfortable reading. On a P8 board that is 500 ÷ 8 = 63 pixels, comfortably above the 14-pixel floor. The same 500 mm headline on a P20 gantry board is only 25 pixels tall — still legible, but with much less room for fine detail. That is the arithmetic you want before the designer opens a layout, not after.
5.2. Safe Zones, Margins and Reading Time
- Keep a margin. Reserve at least 5% of the canvas width on every edge so that text never sits under a cabinet seam, a fixing bracket or the board frame.
- One idea per frame. Advertising boards are read in glances. A single product, a single price or a single message per rotation outperforms a crowded layout every time.
- Design for the dwell time. A driver at 50 km/h covers about 14 m every second, so a board that is legible for 6 seconds of approach gives roughly 5 seconds of usable reading time. Work out that window for your site and design to it.
- Test at pixel scale. Check the layout at 100% on the native canvas, then at 25%, which is roughly how it will look from the far end of the viewing distance range.
5.3. File Formats, Weight and Playlist Planning
- Supply video at the native canvas or an exact multiple of it. Arbitrary scaling softens edges and can break thin text.
- Keep the frame rate consistent across the playlist and avoid mixing 29.97 and 30 fps material in the same rotation.
- Use a codec the media player handles natively, and confirm the maximum bitrate before the first creative is delivered.
- Plan the total playlist weight early. Too many heavy files produce visible gaps at the point where one clip ends and the next begins.
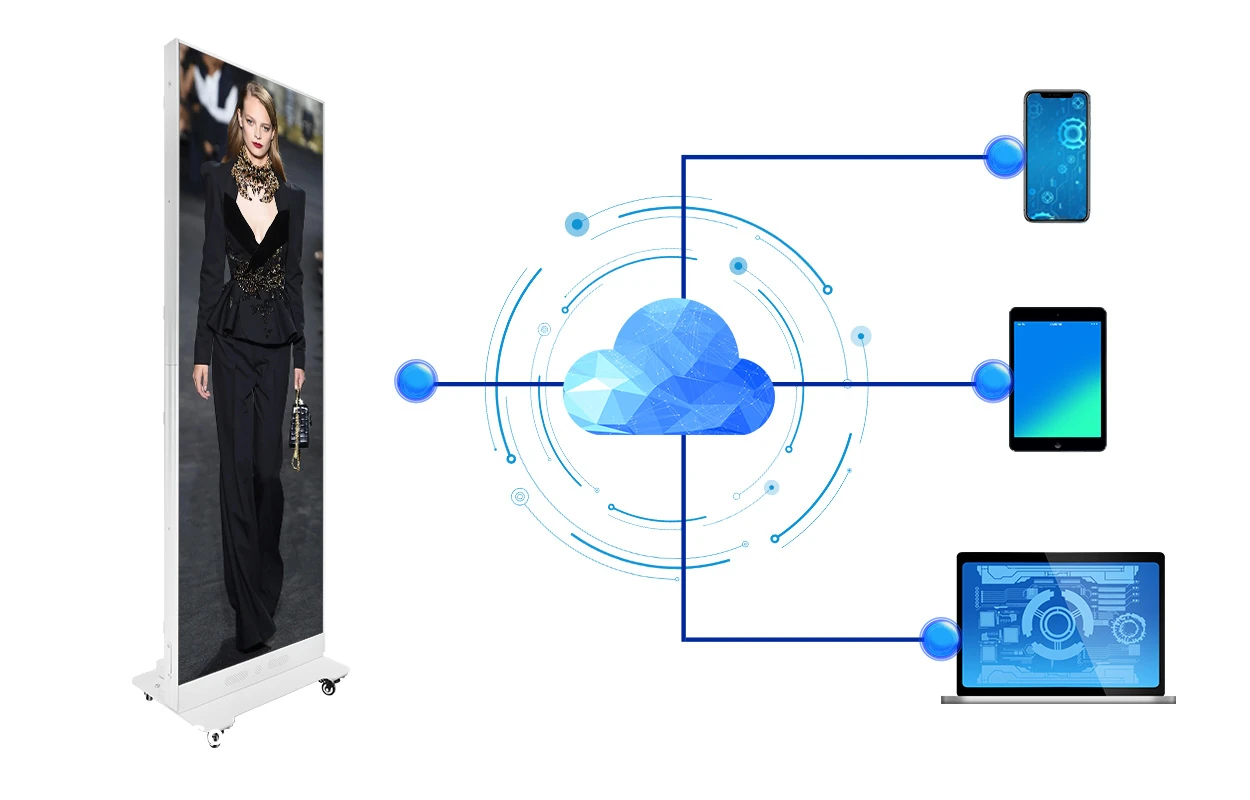
- Decide who publishes. A network of boards needs remote scheduling and proof-of-play, and EagerLED publishes a free digital signage software option that covers scheduling and content delivery.
6. Plan the Structure: Cabinets, Mounting and Site Constraints
A pixel plan that cannot be built on the site is not a plan. Before the specification is frozen, confirm how the board will be supported, how it will be serviced and how it will be protected. These constraints can change the cabinet format, the pitch and even the canvas, so they belong in the planning stage rather than in the procurement stage.
6.1. Service Access, Weight and Module Replacement
- Front service or rear service. A board mounted flush against a wall usually has to be front-serviceable, so modules and power supplies are removed from the front. Where there is a maintenance walkway behind the structure, rear service is simpler and often cheaper.
- Module removal clearance. Access equipment needs room to work. If the board sits above a road or a shopfront, assume a ladder or a platform will be needed and plan the lift points.
- Weight on the structure. An outdoor cabinet, its steel frame and its power supplies are heavy. The structural engineer needs the installed weight and the wind-load case, not just the display area.
- Spares on site. Keep a small stock of modules, receiving cards and power supplies matched to the production batch, so that a single failed module does not leave a dark rectangle in the advertising for weeks.
6.2. Mounting Type and Viewing Geometry
The mounting method decides the viewing angle that matters most. A wall-mounted or facade board is normally viewed from below and from the side, so vertical and horizontal viewing angles both count. A pole-mounted or freestanding board is usually viewed almost straight on, which makes horizontal off-axis performance less critical.
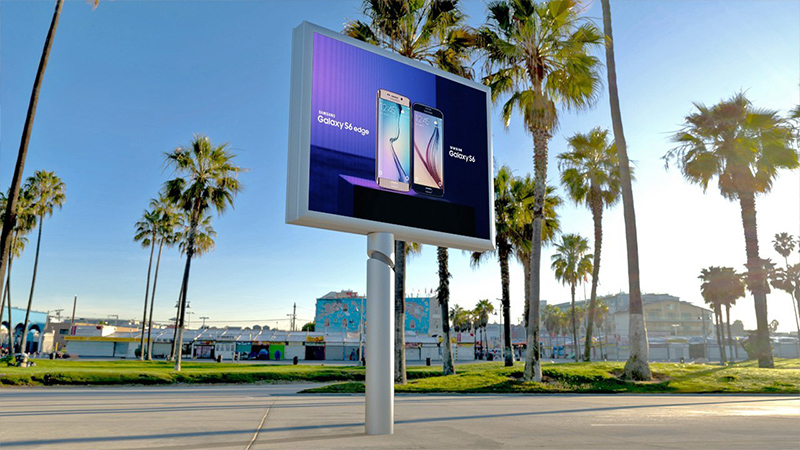
Two practical checks save rework. First, set the bottom edge high enough that pedestrians and vehicles do not obstruct the image, but not so high that the board is out of the natural sightline. Second, confirm the viewing angle — commonly around 160 degrees horizontal and 160 degrees vertical on outdoor modules — against the extreme seats, kerbs or platforms where people will actually stand.
6.3. Power, Data and the Site Survey Checklist
- Power capacity. Confirm the available supply, the peak and average load of the display, and whether a dedicated circuit is needed. Electrical installation should follow the local edition of a recognised wiring code such as NFPA 70, the National Electrical Code.
- Phase balance and earthing. Large single-phase loads on one leg distort the supply; the board needs a proper earth and surge protection at the entry point.
- Data path. Decide between fibre, copper Ethernet and wireless backhaul, and confirm the bandwidth the playlist will need once it is running at full rotation.
- Weather protection. The cabinet, connectors and cable entries have to match the site, not the catalogue. The reasoning behind the ratings is set out in this guide to choosing a waterproof LED display; the underlying ingress-protection tests are defined in IEC 60529.
- Permits and approvals. Advertising consent, structural sign-off, planning restrictions on brightness and curfew hours, and a signed-off sightline drawing.
- Maintenance access. A written plan for how the board will be cleaned, how software updates will be applied and who will respond to a fault.
7. From Plan to Purchase: Specify and Verify the Board
By this point the plan should be a set of numbers, not a set of adjectives. Turning those numbers into a purchase order is mostly a matter of writing them down in a form the supplier has to answer line by line, and then testing the result against them.
7.1. The Pixel Planning Worksheet
Fill this in before requesting quotations. Every line changes the price, and a supplier cannot quote accurately without them.
| Planning item | What to record | Why it matters |
|---|---|---|
| Nearest viewing distance | Metres from the closest realistic viewer | Sets the finest pitch you can justify |
| Typical viewing distance | Metres from the main audience | Sets the pitch you should actually buy |
| Canvas width and height | Millimetres of visible image area | Drives pixel count and cabinet layout |
| Aspect ratio | 16:9, 4:3 or custom | Determines how creative has to be produced |
| Pixel pitch | Millimetres, centre to centre | The largest single cost driver |
| Native pixel matrix | Columns x rows after the cabinet grid | Becomes the design canvas |
| Content canvas | Design resolution you will deliver | Prevents scaling and distortion |
| Sustained brightness | Nits measured after calibration | Decides daylight legibility |
| Refresh rate | Hertz at the operating mode | Prevents scan lines on camera |
| Grayscale | Bits per colour channel | Controls banding in fades |
| Ingress protection | IP rating for cabinet and power compartment | Matches the site exposure |
| Power | Peak and average load in kW | Confirms the supply and the cable |
7.2. Questions That Separate Manufacturers from Resellers
Advertising boards are often sold through intermediaries, and the quality of the answer to these questions tells you where the engineering actually sits.
- Who specifies the LED binning, and can you show the bin code for the production batch?
- What is the full cabinet dimension list, including tolerance, and how does it map onto my canvas?
- Which controller and video processor are quoted, and how many pixels can each output drive?
- How is colour and brightness uniformity measured, and what is the acceptance figure? A manufacturing process built around verified module supply and documented quality control will have a straight answer.
- What is covered by the warranty, for how long, and what is excluded?
- What spare parts ship with the order, and how long will matched modules remain available?
Canvas terminology is worth standardising too. When a specification quotes a 4K or UHD canvas, the reference point is the ITU-R BT.2020 recommendation for ultra-high-definition systems, which fixes the resolution and aspect-ratio values being discussed.
7.3. Sample Testing and Acceptance Criteria
Ask for a sample array built from the modules that will actually ship, not from a golden unit, and agree the acceptance criteria in writing before production. The checks that matter for an advertising board are brightness and colour uniformity across the array, the dead-pixel allowance and where dead pixels may fall, refresh performance filmed with a phone at the intended camera shutter, and a full-load ageing run that holds the board at working brightness long enough to expose early driver failures.

8. Five Pixel Planning Mistakes That Cost Advertising Boards Money
The same five errors appear in project reviews again and again. Each one is cheap to avoid at the planning stage and expensive to correct afterwards.
8.1. Buying the Finest Pitch “for the Future”
A finer pitch does not make a board more future-proof; it makes it more expensive. Resolution is limited by the source content and by the viewer’s eye, not by the module. If the nearest viewer is 15 m away, a P4 board and a P8 board look the same to that viewer, and the difference in price buys nothing that the audience can see.
8.2. Forgetting the Content Canvas
A board built to a 744 × 372 canvas will never show a 1,920 × 1,080 file at its best. Designers who are handed the pixel matrix before they start produce sharp work; designers who are handed a size in metres and left to guess produce files that are scaled, softened or cropped at commissioning.
8.3. Ignoring the Nearest Viewer
Average viewing distance is the wrong number. The audience that judges the board is the one standing closest to it: the pedestrian at the crossing, the passenger on the platform, the driver stopped at the lights. Plan the pitch for them and let the distant audience benefit from the extra sharpness.
8.4. Under-Specifying Brightness and Dimming
Brightness is usually specified as a peak figure and then never measured again. The number that matters is sustained brightness after calibration, plus a dimming range wide enough to run comfortably at night. A board that cannot dim smoothly will be turned down to a dull grey or switched off entirely, and either outcome wastes the advertising slot.
8.5. Skipping the Acceptance Test
Signing off on a photograph of the factory test instead of on measured results transfers all the risk to the buyer. Agree the acceptance criteria in the contract, test the actual production batch, and inspect the first installed board at night as well as in daylight — half of all pixel problems are only visible after dark.
9. FAQs
10. Conclusion
Pixel planning is what turns an advertising idea into a display that can actually deliver it. Decide who reads the board and from how far, convert that distance into a pitch, work the pitch and the cabinet grid into a native pixel matrix, and hand that matrix to the creative team as the canvas. Brightness, bit depth, refresh rate and weather protection then follow the same plan rather than fighting it.
The mistakes are predictable and the fixes are cheap at the planning stage. Do not buy finer pitch than the audience can resolve, do not average the viewing distance across the whole site, and do not sign off without a measured acceptance test on the production batch. Get those three right and the board will still look sharp after several years of weather, traffic and content changes.
EagerLED builds outdoor advertising LED boards as complete systems, from the module and cabinet specification through to the control system, the waterproof enclosure and the spare-parts list that ships with the order. If you are planning a board for a roadside, facade or street-furniture site, start with the outdoor advertising LED board range, compare the pixel planning table in section 3 against your own sightlines, and then talk to our team through EagerLED contact about the specific site.
About this guide: Published for EagerLED, an LED display manufacturer and supplier. The formulas, worked examples and planning table are practical engineering guidance based on standard signage and display practice; they are a starting point for a specific project, not a substitute for a site survey, a structural assessment or a local electrical design. Standards references point to the bodies that publish them. Technical sources reviewed September 11, 2026.
 Outdoor LED Advertising Board: Weatherproofing Guide